Showing posts with label tutorial. Show all posts

Wednesday, March 25, 2026

Easy Cookie Pops....

Here's a quick and easy treat to add to your dessert tray this spring:

Thursday, March 5, 2026

Bunny Napkin Folds for Spring...

Here are a few Bunny Napkin Folds for your Spring/Easter table:

Saturday, January 25, 2025

Fabric Bowls - Do it Over Designers


I am joining Ann, from Apple Street Cottage, for a recycle/upcycle blog hop!
Join the "Do It Over Designers" where we transform something that needs a makeover. 

Here's a fun way to use up your fabric scraps - create bowls - which are perfect catch-alls for candy, keys, cotton balls, etc!


Tuesday, January 21, 2025

Valentine Heart Favor

Here's a quick Valentine craft to whip up for a friend:

Thursday, January 9, 2025

Free Motion Stitching - A Valentine Pillow

Free Motion Stitching is a fun way to add some whimsy to hand painted fabric:

Sunday, November 17, 2024

Tuesday, September 21, 2021

Pinterest Challenge - PEACE - and cookies!


Today is International Day of Peace

The purpose of this Pinterest challenge is to act on something we have pinned.  

This month's theme is PEACE


Read on to see how I related owls, peace and cookies....


Wednesday, September 8, 2021

A SHINY PUMPKIN!

I wanted a shiny pumpkin for my lantern so I bought a small pumpkin..... 


Saturday, November 28, 2020

Do It Over Designers - Recycling Your Throw-aways!


Today I am sharing a few quick and easy ways to recycle our typical throw-aways to create packaging for birthdays gifts, holiday gifts or last minute hostess gifts.

The first idea is to take a pizza/cookie box....


....and cover it with gift wrap...


...and attach a card, ornament or label on top:


So, what can you put inside?  

How about a chocolate pizza  (recipe HERE).....


...or cookies (try this delish recipe HERE) or candy (recipe HERE)


**************

I still enjoy magazines.  I know we can see most of the ideas, recipes and stories online, but there is something about flipping through the magazines, dog-earing pages that have something that caught my eye, and ripping out recipes!

I try to pass magazines on to someone else, but I have found a way to use the covers!


So, I created a few tote bags!
  
Sometimes I need just a small reusable bag when I run into a store and this is the perfect size:


These also make unique gift bags!


They are simple to make and all you need is 5 magazine covers, a grommet tool and grommets, ribbon or cording and a sewing machine!

What can you put inside?  Make-up, t-shirt, jewelry or any "fashionable" gift!

********************

My last idea is to use a large tin can and a wooden ornament that you can find at the craft store.  You can paint your own, or buy one already painted.  Spray paint a can and glue the ornament on the front:


These can be filled with cookies, sox, candy, jewelry....the ideas are endless!

**************************

Visit these other creative designers to see what they have created:


Thanks for stopping by!

Tuesday, November 24, 2020

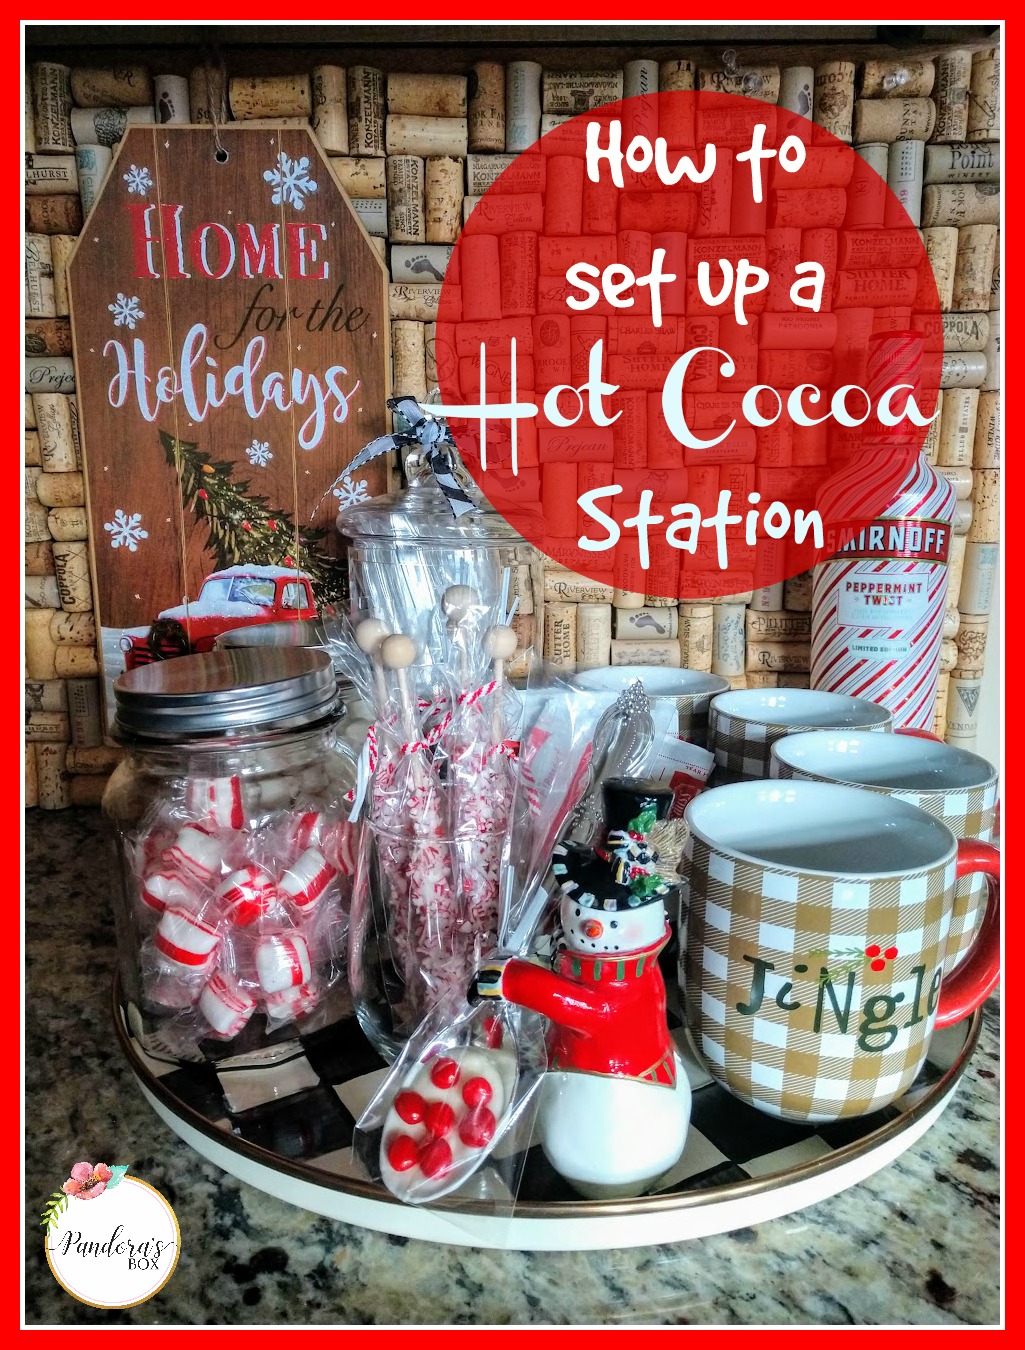
Add a little more flavor to your cocoa ...and how to assemble a Cocoa Station


It's so easy to set up a Cocoa Station and to make it special, you can make a few white chocolate spoons...let me show you how!


These Sweet Spoons are very easy to make!


All you need is some chocolate buttons to melt, a few sturdy plastic spoons, and some cinnamon candies, crushed peppermints or sprinkles!


Simply dip the spoons into the melted chocolate and sprinkle with the candies, then lay the spoons on waxed paper.


I wrapped each in "pretzel bags" (I cut them a bit shorter).


All you have to do is stir one into a cup of hot cocoa for added flavor!


To set up a Cocoa Station, all you need is a tray, or area in your kitchen to gather your mugs and supplies needed to prepare a cup of cocoa.  I chose a round tray and 4 mugs:


I bought marshmallows at Trader Joe's (they are the best!!) and put them in a jar and placed some peppermint sticks in a glass:


A bowl of cocoa packets and a jar of peppermints are also on hand:


My handmade spoons are also in a large apothecary jar:


So I can just grab a mug and enjoy a cup of cocoa whenever I catch a chill and add some more flavor if I am in the mood!


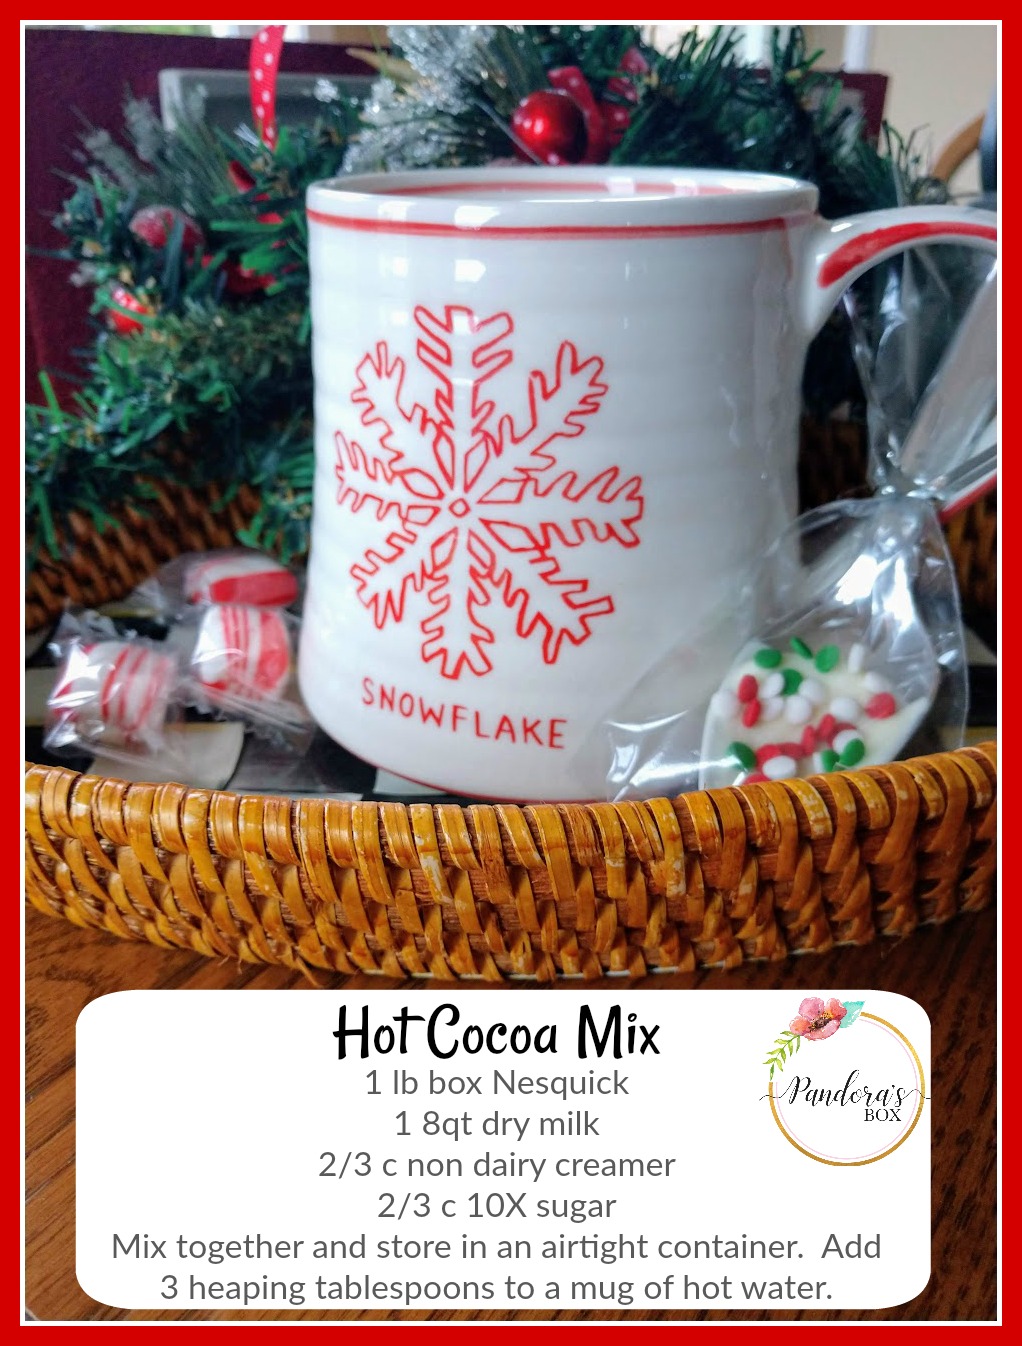
If you want to make your own Cocoa mix, here's an easy recipe:


ENJOY!

There's a little bit of irony in this sign for 2020!


Friday, July 3, 2020

Vanilla Vodka Cherry Bombs


A friend of mine took these to a party last year, so I decided to make a few for this 4th of July.

She calls them Cherry Bombs, using plain vodka, but I had a little vanilla vodka that needed to be used up!

All you need is a jar of cherries with stems, vodka....

...some white chocolate and blue sugar sprinkles:


Soak the cherries overnight in vanilla vodka.  
Remove them from vodka and dry them well on paper towels.
Dip them into white chocolate, place on wax paper, and sprinkle blue sugar on them!


And it is as simple as that!


I bet you are wondering what I did with the leftover vanilla vodka that is now "cherry favored"?  
I plan on making us a cherry-vanilla coke cocktail tomorrow!


Wishing you a safe and healthy 4th of July!

Wednesday, June 10, 2020

Red, White and Blue for 10 on the 10th

There is something so festive and patriotic about red, white and blue!  It is very easy to find decorations, dishware and ornaments to celebrate our nation!  

You can actually keep this decor out all summer to celebrate Memorial Day, Flag Day, 4th of July and Labor Day!


Our "10 on the 10th theme" this month is RED, WHITE and BLUE!


I doubt many will have large parties, but this is a cute idea for holiday favors:

I took a few flags I bought at our local dollar store (6/$1.00)...


...and I stitched plastic to the front of them, cutting the plastic a bit larger than the flag.  You can use an old clear table cloth, a zip loc bag, or purchase a small amount of plastic at the fabric store.  I used a zip loc bag this time.

Before I sewed it closed, I slid a few peppermint candies in between the plastic and the flag.  (You could also use red, white and blue M&Ms. ) I trimmed the plastic to the size of the flag to neaten it up:


They make a cute favor!


These adorable paper pockets with wooden flatware are from Target (4/$3)


Another idea which costs under $10 is a candy bouquet that I made last year for our 10 on the 10th post and you can learn how to make it HERE :


And how many of you enjoy corn on the cob?  Make up some cute, festive herbal butter stars:


Simply mix softened butter with fresh, minced herbs from your garden and press into a mold, chill and pop out onto a plate!


And this is a freebie idea.  Use your leftover spice cans for vases for your mini flowers from your garden:


The cans leak, so simply line the tin with a zip baggie, cut off the top, insert into can and fill with water:


Stop by to visit these clever bloggers to see their take on Red, White and Blue while spending less than $10: